If you are using Kubernetes, then you will definitely know about helm charts. Helm chart is nothing but a deployment tool, it helps us to deploy, upgrade, and manage our applications in the Kubernetes cluster.
Recently Komodo announced an open-source dashboard for helm. Today we will see how to install and use it.
Requirements :
1. Kubernetes cluster
2. Helm
Steps :
Step 1: Installation
Step 1.1: Overview of my existing cluster setup:
Am running minikube version 1.26.0 and the helm version is 3.9.2. Am going to use this setup for this installation.
Step 1.2: Installation of helm dashboard,
execute the below command where the helm is installed,
# helm plugin install https://github.com/komodorio/helm-dashboard.git
Then execute the below command to start the helm dashboard,
# helm dashboard
If your port 8080 is already used, we can change it by using the environment variable as "HD_PORT".
If you want to run it in debug mode, set DEBUG=1 in the environment variable.
If you see the bey default helm dashboard will check for checkov and trivy plugins to use these tools for scanning purposes.
Step 2: Access the helm dashboard,
Go to the browser and access the dashboard, http://localhost:8080
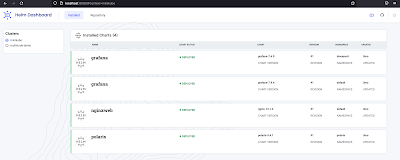
Now, we can see the already installed applications through helm, which we have seen in step 1 by using helm commands.
We can see the list of helm repositories from the UI,
Whatever we do from the helm command, Now we can do it from UI itself. We can view the existing manifest, upgrade, uninstall, etc.
We can install the application from the available helm repositories from the UI.
And by default, this dashboard detects checkov and trivy scanners. And this dashboard uses these tools to scan the manifest during deployment.
That's all, the helm dashboard is installed successfully and able to view the deployment.


Post a Comment